

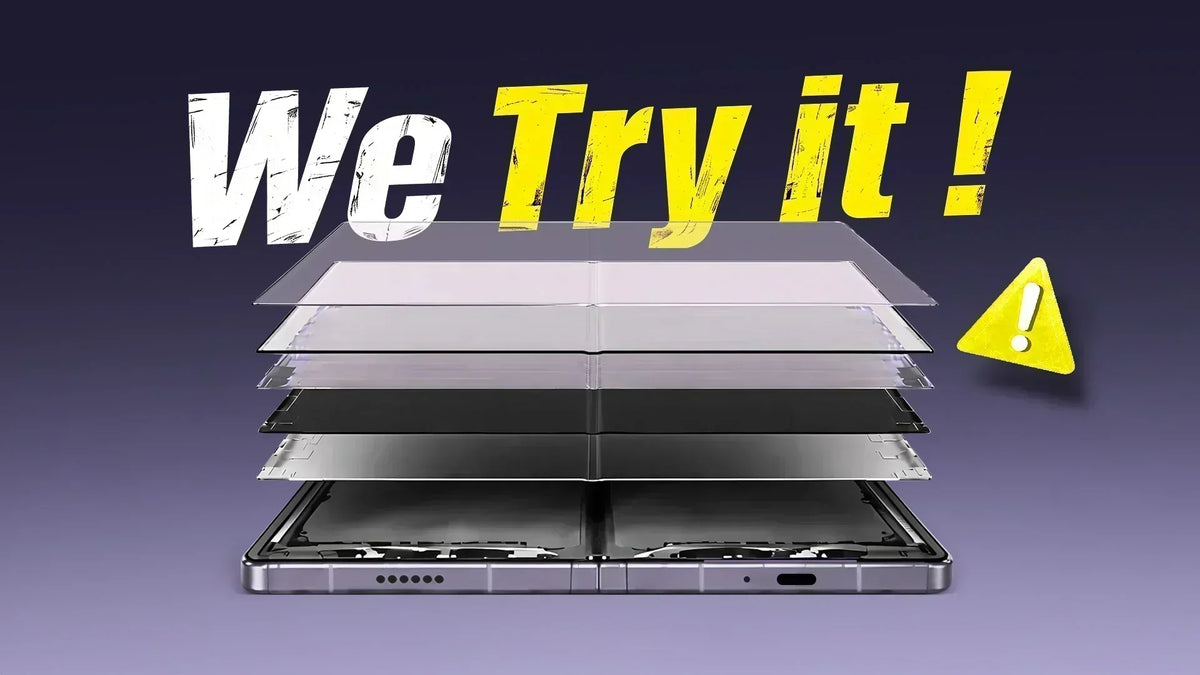
With Samsung's latest Galaxy Z Fold8 bringing foldable phones back into the spotlight, attention is once again turning to the repairability of foldable displays. Samsung officially describes the Galaxy Z Fold5 main display as using Ultra Thin Glass (UTG), a key part of its flexible display construction.

REFOX Lab takes a close look at Samsung Galaxy Z Fold5 screen refurbishment, focusing on the most technically demanding parts of the process—from separating the Ultra Thin Glass (UTG) to restoring the screen surface and verifying the final display performance.
Why Is Galaxy Z Fold5 Screen Refurbishment So Difficult?
Multiple ultra-thin functional layers must work together while remaining flexible enough to fold repeatedly. These include the PET protective film, Ultra Thin Glass (UTG), the COE layer, flexible OLED, and a reinforced support structure with a hinge mechanism.
The COE layer is fragile. If it is damaged accidentally, the OLED layer underneath it can also be affected, potentially making the entire screen unusable.

Remove the damaged PET protective film and Ultra Thin Glass layer without damaging the functional OLED underneath.
What You'll Need for This Refurbishment

- REFOX RA30 SupWire Screen Cutting Wire — High-hardness cutting wire for quick screen separation.
- REFOX RS75 Universal Knife Handle Set — Dual-head precision tool for disconnecting flex cables.
- REFOX RS30 ESD Repair Heat Mat — Anti-static heating pad for safe adhesive softening.
- REFOX RS62 Handy Plastic Opening Card
- Rotary Phone LCD Screen Separation Machine
- Universal Foldable Phone Screen Alignment Laminating Mold
- Laminating machine
- Glue removal rod
- Nipper pliers
- Tweezers
- Blade
- Isopropyl alcohol
- New foldable screen cover
Why Does This Refurbishment Require Cutting Wire Instead of a Laser Machine?
A laser can be highly effective for adhesive or display separation in many repair scenarios. However, the COE layer in this five-layer structure is extremely thin and delicate.
An incorrect laser setting, position, or penetration depth could permanently damage the OLED layer underneath the COE layer.

For this reason, REFOX Lab uses a manual separation method for this particular Z Fold5 inner OLED refurbishment process, allowing the technician to control the cutting position and force much more precisely.
How Does the REFOX RA30 SupWire Cutting Wire Make a Difference?
The cutting wire is one of the key tools in the refurbishment process because its extremely small diameter—0.028 mm in this foldable screen refurbishment—allows it to enter the narrow gap between display layers.

Instead of cutting directly through the entire screen stack, the cutting wire is guided underneath the UTG layer and used to separate the bonded layers progressively.
- Suitable heat helps soften the adhesive and makes separation more controllable.
- The cutting wire needs to remain close and parallel to the screen surface.
- Pulling force should remain consistent rather than being applied suddenly.
- The cutting wire must be repositioned carefully as the separation progresses.
- The technician must ensure the UTG is fully separated without contacting or damaging the COE layer.
Cleaning the OCA: Another Critical Refurbishment Stage
After the damaged PET and UTG layers have been removed, the screen is not immediately ready for a new cover plate. Residual OCA must first be removed from the surface.
This stage may look less dramatic than UTG separation, but it is equally important for the final refurbishment quality. Any remaining adhesive, dust, or contamination can create problems during subsequent lamination, including bubbles, unevenness, or surface defects.

Cleanliness directly affects lamination quality. In addition to using a professional glue-removal rod to clear away the OCA adhesive, isopropyl alcohol and a cleaning sponge should also be used for thorough cleanup.
REFOX Lab uses a specialized slim glue-removal rod and a controlled inward cleaning motion to remove the remaining adhesive while minimizing stress on the delicate COE layer.
What Does the Refurbished Galaxy Z Fold5 Screen Look Like?
After the new cover plate is laminated, the refurbished screen returns to a smooth and flat appearance without bubbles or surface defects. More importantly, the original OLED panel remains functional because the underlying display layers were successfully preserved during refurbishment.
The phone is then fully reassembled and subjected to functional testing. REFOX Lab checks:
- Touch response: Fast and sensitive
- Display performance: No abnormal bright lines or dark spots
- Touch drawing: Smooth and uninterrupted


A screen refurbishment should not be judged solely by how the screen looks after lamination. The underlying OLED, touch function, and complete device operation must also be verified.
Is Deep Refurbishment Worth It for a Damaged Foldable OLED?
The answer depends on the condition of the original screen. If the underlying OLED remains fully functional while the outer PET/UTG layers are damaged, refurbishment can potentially preserve the original display panel—the COE and OLED layer—rather than spending a large sum of money to replace the entire assembly.
For professional repair shops, this creates an important repair possibility: recovering value from high-cost foldable OLED assemblies that might otherwise be considered uneconomical to repair.

Foldable OLED refurbishment has a significantly higher technical barrier than conventional screen refurbishment. Specialized equipment, suitable consumables, precise temperature control, experienced technicians, and strict process control are all important.
Pro Tips: What May Cause Foldable OLED Refurbishment to Fail?
The following points summarize some of the most failure-prone areas demonstrated in the video. They are particularly useful for technicians who are new to foldable display refurbishment.
Always verify display and touch functionality before starting. A fully functional OLED is the foundation for a successful refurbishment.
The objective is controlled layer separation, not maximum cutting speed. Excessive force can damage the COE or OLED layer.
Uneven wire angles or excessive tension can increase the risk of entering the wrong layer.
Residual adhesive can cause bubbles and surface defects after lamination. Thorough cleaning is essential.
Even if the screen has been separated perfectly, inaccurate positioning of the replacement cover plate can affect the final appearance and fit.


Always perform display, touch, and functional tests after refurbishment. A visually perfect screen is not necessarily a functionally perfect screen.
Frequently Asked Questions
1. What is UTG on the Galaxy Z Fold5?
UTG stands for Ultra Thin Glass. Samsung identifies UTG as part of the Z Fold5 main display and explains that it helps provide improved flatness while maintaining the characteristics required for a foldable display.
2. Why is foldable OLED refurbishment more difficult than regular OLED refurbishment?
Foldable displays contain multiple extremely thin layers that must remain flexible and precisely aligned. During refurbishment, technicians must separate damaged layers without damaging the underlying COE and OLED layers.
3. Why does REFOX Lab use ultra cutting wire instead of a laser for UTG separation?
The process uses manual separation because the COE and OLED layers beneath the UTG are extremely delicate. A laser penetrating too deeply could damage the underlying OLED structure. Manual cutting provides more direct control over the separation process.
4. Can a damaged Z Fold5 screen always be refurbished instead of replaced?
No. Refurbishment is not suitable for every damaged screen. If the OLED itself has significant damage, such as lines, dark spots, display abnormalities, or touch problems, replacing the display assembly may be more appropriate.
5. How do you know whether a refurbished foldable OLED is successful?
Successful refurbishment should pass both visual and functional inspections. The screen should be properly laminated without significant bubbles or defects, while display, touch, and other device functions should operate normally after reassembly.
Tips & Tricks from the REFOX Lab Bench
Create an opening at a 15° angle on the non-flex-cable side of the screen. Gently and slowly cut the PET and UTG layer to open an insert for cutting wire.

Getting the cutting wire into the correct layer is critical. If the wire enters the wrong layer, it can damage the COE layer or even the underlying OLED panel. Maintain even tension on both sides of the cutting wire to separate the damaged PET and UTG layers.

Use a specialized glue-removal rod and a rolling technique for OCA cleaning on the COE layer. Pressing inward from both ends toward the center to form a C-shape helps clean OCA thoroughly.

Conclusion: Foldable OLED Refurbishment Is All About Precision
Samsung's foldable displays have made screen repair considerably more challenging because the display is no longer just a rigid glass-and-OLED assembly. The Z Fold5 inner screen combines multiple thin, flexible, and highly sensitive layers that must survive repeated folding.
REFOX Lab's refurbishment demonstration shows that when the OLED remains functional, it may be possible to recover the original panel by carefully removing the damaged PET and UTG layers, cleaning the OCA, accurately aligning a replacement cover plate, and completing the lamination and testing process.
The real challenge lies not in removing the damaged PET and UTG layers, but in doing so without damaging the underlying COE and OLED layers.
In this case, REFOX Lab successfully achieved the technical inner OLED refurbishment for Samsung Z Fold5 screen assembly, giving this Z Fold5 a second life with a 0.028 mm REFOX RA30 SupWire, a slim glue-removal rod, and a steady hand.
Share:
Essential Repair Tools and Machines Every Professional Repair Shop Needs in 2026